Each year, for the past nine years I have been married, we have been able to claim the medical deduction on our taxes. It gets us a few hundred back. But the thing is, we spend a few thousand on medical. Most years, between my son's OT, my hubby's Epilepsy, and my slow decline, we have spend upwards of fifteen percent of our income on medical. The year our second son was born, we spent almost 30% of our income on medical. My hubby makes an alright living, and our insurance is reasonable. It's our copay, deductibles, and everything else adding up. Especially for Ot and PT. I have gotten temp jobs, night jobs, and done sewing for money trying to make ends meet.
Technically my husband's income is too high for us to qualify for any kind of discount or services, but what they don't account for is when a quarter of our net goes to the doctors.
So, I do a few things to save money:
Baby:
Cloth diaper
Nurse
make my own baby food
Make baby clothing (FREE fabric, or out of old clothing)
Ask for hand me downs. I am not shy!
FOOD
Meal plan around Sales.
Freeze foods
Check coupons
Buy Bulk when on sale
Foods in Season
Crock pot
Oven-tips: With Casseroles and things that take a while, I turn down heat or off, for the last 15 min of an hour long cooking time
-Have a master price list: know the best price,
Go generic when it does not matter.
Stretch meat.
When I mix "juice" or punch, I always add a third more water then the recipe states.
Free Food: When the apple tree down the street is dropping apples into road, I ask if i can have some, and make apple sauce. Pick blackberries down by the river and make jam.
Electrical
No TV service.
During the day I keep Lights off, open window blinds, and use sunlight.
Wash in cold, at night, only full loads, with 1/3 detergent recommended.
Run the spin cycle a second time, gets more water out.
Line dry, everything but socks and underwhere.
Wash dishes at night, and never use the "dry cycle" just air dry
Low flow in Toilet, and "share a flush"
Water-heater set to lover temp
Winterize our home, preventing loss of heat.
Dress in layers, at home.
Get free wood, and have fires instead of turning up the heater.
I reuse plastic bags
Where it out, then patch it up.
Do a lot of the fix it myself, Dad's a general contractor, and You-tube
Cloth napkins, not paper towels
Always check clearance
No Vacations
No subscriptions or magazines
No Dry clean
Don't drink Coffee, or alcohol.
No Smoking
No Gym memberships
No landline
No hairdryer
Don't use dryer sheets
Walk whenever possible
Print for free at the library .
Sell on Etsy, and Craiglist and hold yard sale.
Any other suggestions?
Showing posts with label Sewing. Show all posts
Showing posts with label Sewing. Show all posts
Saturday, April 15, 2017


Tuesday, September 2, 2014
New ETSY Shop
etsy.com/shop/MFromOrdinary
I'm working for an Etsy shop.
I have designed several images we have turned into pendants
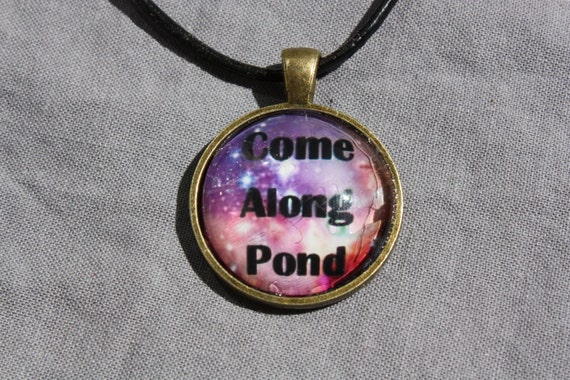
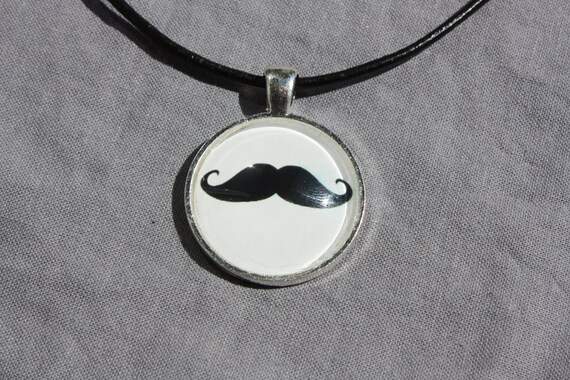
And I have embroidered some burp cloths and Bibs with geeky decorations.
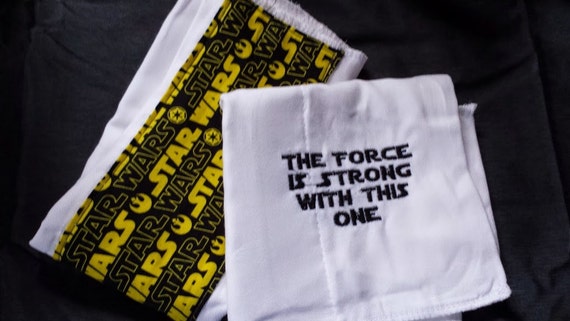
I'm working for an Etsy shop.
I have designed several images we have turned into pendants
And I have embroidered some burp cloths and Bibs with geeky decorations.
Friday, October 26, 2012
baby girl shirts
My Cozen just had a baby. Its a girl.
As our gift my mother got a package of Onsies, and I decorated them.

As our gift my mother got a package of Onsies, and I decorated them.
The Butterfly on the top left, is from Appliqué Fun.
The sheep under it is an applique from Anita Goodesigne Stuffer Animals.
And so are the Bunny and Duck, but not as applique.
The second butterfly is a Decode Colection Quilt stitch.
Friday, September 28, 2012
Baby Tie shirt
Here I turned a bodysuit undershirt into a Sress shirt, compleat with tie.
 I drew it on with fabric paint.

Wednesday, September 26, 2012
Cloth diapering. Part 5. Assembeling Stuffer style
With the elastic on the leggs, you next you the Braded elastic to sinc up the back.
About 5 inches, stretched accros the back, and sewn down with the stretch/zigzag stich.
At this point pin the wing reinfoucements on, and basting stich arround the edge. Leavin as tinny a seam allowance as you can.
Pin the liner fabric on, right sides together and sew then together, leaving the back opened just big enough to get your hand in.
Right side out them.
About 5 inches, stretched accros the back, and sewn down with the stretch/zigzag stich.
At this point pin the wing reinfoucements on, and basting stich arround the edge. Leavin as tinny a seam allowance as you can.
Pin the liner fabric on, right sides together and sew then together, leaving the back opened just big enough to get your hand in.
Right side out them.
Cloth diaper. Part 4 . Start Asembeling
First you want to lay out your diaper shaped PUL, fabric side down.
Pin your Wing reinforcing fabric, just arround the edges.
Keep in mind any place you pin the frabric is a place that moisture can get thru.

4 inches per leg of the clear elastic. Pin it down, Just at the ends, of the leg section.
It is best to sew thease down at this point.
Using a zigzage or stretch stich, sew the elastic down, along the curv, while you stretch it out.
[]
Now from here the style's branch out.
Monday, September 24, 2012
Cloth Diaper. Part 3. "soakers"
The soaker's are the part that does the work of soaking up the pee or poo.
Cotton, Hemp. This is the absorbent stuff.
Cotton, Hemp. This is the absorbent stuff.
- For the Covers style
- Prefold.
- Several layers of lightweight fabric, sewn together into a rectangle.
- You can get them almost any baby supply place, for $1 each
- Standard in the 60-80s
- flat fold. Just a flat piece of fabric, hemmed on the edges, that you fold around the baby's bum.
- Stuffer style
- The Stuffer or Insert is several layers of absorbent fabric sewn tightly down,into a single piece.
- Sized needs to be slightly less wide and slightly shorter then the core of the finished diaper. Approximately 11 X 4 inches.
- I have made then out of all t-shirts, towels, washcloths. Size is not too important as long as they don't stick out of the diaper. But they do need to lay flat.
- All in one style
- Several layers of absorbent fabric sewn into several leafs
- Sized needs to be slightly smaller then the core of the finished diaper. Approximately 11 X 4 inches.


Saturday, September 22, 2012
Cloth diapers Part 2. Cutting out the "diaper"

I like to lay my pattern out like so for cuting the PUL fabric. It makes it easer to fit the pattern four times.
And the piece that is left over. from between the diapers, can be cut up to use for reinforcing the wings on the diaper. I end up with very little waste fabric.
Green Bonus.
And cut a small piece of liner going across the tummy.
If you our doing the Cover style, then you are ready for the next step.
If your doing Stuffer style or All in one style: Cut out you Diaper pattern on the PUL as well as the Liner fabric.
Thursday, September 20, 2012
Cloth Diapers. part 1. Supplies
- 1/2 yard of Waterproof PUL fabric.
- Polyurethane Laminate fabric is used to make the outer shell.
- This is the same regardles of the style or option
- The diaper pattern. You can find then online, or just sketch out our own.
- Liner. Microfiber, Microflease or microswade.
- For the Cover style, you just need a 1/8th of a yard.
- For the Stuffer or All in one style you need 1/2 yard.
- Elastic
- For the Cover Style
- fold over elastic.
- Clear elastic. 1/4 inch wide, 48 inches long
- For the Stuffer or All-in-one style
- Polly brade elastic. 1/4 inch wide 24 inches long.
- Clear elastic.1/4 inch wide, 48 inches long
- Closures Option
- Hook and loop, or Velcro. one ince wide, 24 inches long.
- snaps. 48 sockets, 16 studs, 64 caps.
- Ribon & S hooks, 8 of them.
This will get you all set to make 4 diapers. For me, this came to about $12 a diaper.
You can get this stuff at most fabric stores, or online at specilty baby diaper places
Like: verybaby.com or find your own.
Tuesday, July 10, 2012
Canvas Bag Tutorial pt 2
Fold the bag, right sides, out sides together.
Marking the middle with a pin. Unfold.
From the middle pin, measure out three inches, in each direction, and mark with pins again.
Do this on Both sides.
This indicates your bag's bottom.*
With the bag flat out, one handle in front of you, pinch the fabric at the center pins, and fold it up towards you to meet the second set of pins. Then fold the other handle up to meet the first handle.
It should look like this, from the side.
Pin it down, and then sew up the sides as is.
When you right side out the bag, the tucked section will fold up, and that makes the bag's base.
* At this point you could use some iron on vinyl to make the bottom more waterproof, or some fusible interfacing to make it more stiff, but it's not necessary.
Sunday, July 8, 2012
Canvas Bag Tutorial pt 1
If you have ever gotten one of those “fabric” “reusable”
bags at the grocery store you might be disappointed. They rip, and they don’t wash
well. (YES you should wash them; your
food was in there!)

Make your own? But most styles require
piecing the bag together, with up to 5 pieces, not counting structural support and handles.
So check this out for Easy and sturdy:
Supplies:
Get 20 Inches of some 36 inch wide canvas fabric.
3.5 yards of one inch wide coordinating ribbon.
Thread and you are set.
Instructions: Pt 1
Lay out the Fabric, flat.
On the short end, measure in six inches, and pin the end of the ribbon, with the tail coming out.
Measure about 23 inches of the ribbon into a loop, and then pin that spot down six inches from the edge, on the same end.

Continue with the ribbon, laying it down the length of the fabric, keeping six inches from the edge.
When you reach the other end make a matching loop of 23 inches. And then continue down the length of the ribbon to meet up where you put the first pin.

Sew the ribbon down.
At this point, you can embellish the bag. Embroider, fabric paint, you get the idea.
Monday, July 2, 2012
Make your own Cloth diapers
I am inspired to publish a multi part tutorial for making your own cloth diapers.
I'm doing it, so it can't possibly be that hard.
Cotton Babies is an EXCELLENT source for cloth diapering info. Their Blog answers most questions. But only you know what will work for you.
But for my purposes cloth diapers comes down to three variables;
How it assembles and how it stays on.
Style 1_ Basic cover/wrap. Single layer that hold moisture, goes over the thing doing the absorbing
Style 2_ Stufer/pocket. Two layers that you can stuff the absorbing cloth between
Style 3_ ALLinONE. Multiple layers that absorb and hold, that are pre-assembled.
Opt _1 Snaps Closure
Opt _2 "hook and loop" Closure
Opt _3 "S hook" Closure
So to give you an idea:
Diaper 1.1 would be a basic cover, with snaps. Econo Bums brand is this style
Diaper 3.2 would be an ALLinONE with hook and loop closure. bumGenius brand is this style.
I will also tell you about the "brands" of cloth diapers that I have experienced. Not all of which are official, or even still exist :) Each has pro and con, and people dedicated to each.
Some people go for one style at night and another during the day, and a third for travel.. My hubby said he wanted me to stick with ONE style so that he did not have to think too hard when changing.
I'm doing it, so it can't possibly be that hard.
Cotton Babies is an EXCELLENT source for cloth diapering info. Their Blog answers most questions. But only you know what will work for you.
But for my purposes cloth diapers comes down to three variables;
How it assembles and how it stays on.
Style 1_ Basic cover/wrap. Single layer that hold moisture, goes over the thing doing the absorbing
Style 2_ Stufer/pocket. Two layers that you can stuff the absorbing cloth between
Style 3_ ALLinONE. Multiple layers that absorb and hold, that are pre-assembled.
Opt _1 Snaps Closure
Opt _2 "hook and loop" Closure
Opt _3 "S hook" Closure
Diaper 1.1 would be a basic cover, with snaps. Econo Bums brand is this style
Diaper 3.2 would be an ALLinONE with hook and loop closure. bumGenius brand is this style.
I will also tell you about the "brands" of cloth diapers that I have experienced. Not all of which are official, or even still exist :) Each has pro and con, and people dedicated to each.
Some people go for one style at night and another during the day, and a third for travel.. My hubby said he wanted me to stick with ONE style so that he did not have to think too hard when changing.
Thursday, April 5, 2012
Rux Pin
I am a child of the 80s.
I, like most kids I knew, wanted a "teddy Ruxpin" to read them stories.
Well, Hubby found instructions on how to adapt a plush toy to recognize certain objects, and play corresponding sound bites.
So, were making our own!
It's Going to be a Plush robot.
I designed it myself.
Two cubes, augmented with Buttons.
Here is the Beta, made from scrap fabric.

Here are some of the Ideas we have:
When you lay the Robot on the Winni the Pooh nap blanket, it will tell you a nap time story.
When you lay the Robot in the Crib, it will sing "daisy, Daisy"
When the Robot gets close to the plush tool set, it will say little phrases about fixing and building things.
When the Robot gets too close to the front Dore it will say "I can't do that Dave"
When the Robot gets into the Car it will say "Autobots, Roll out"
This is the 2.0 version. No arms and legs yet.
 I had to remake the body as the Speaker and Battery pack for "Bop the Robot" was so big it did not fit in the 1.0 body. The 2.0 body also had separate internal pockets for the antenna, battery pack and speaker, to keep them for banking into each other, or getting stuffing into there parts.
I'm very tempted to remake the whole thing, since I have learned a lot in the process. Hubby said the same thing. Maybe we should just make Bop a wife...
I, like most kids I knew, wanted a "teddy Ruxpin" to read them stories.
Well, Hubby found instructions on how to adapt a plush toy to recognize certain objects, and play corresponding sound bites.
So, were making our own!
It's Going to be a Plush robot.
I designed it myself.
Two cubes, augmented with Buttons.
Here is the Beta, made from scrap fabric.

Here are some of the Ideas we have:
When you lay the Robot on the Winni the Pooh nap blanket, it will tell you a nap time story.
When you lay the Robot in the Crib, it will sing "daisy, Daisy"
When the Robot gets close to the plush tool set, it will say little phrases about fixing and building things.
When the Robot gets too close to the front Dore it will say "I can't do that Dave"
When the Robot gets into the Car it will say "Autobots, Roll out"
This is the 2.0 version. No arms and legs yet.

I'm very tempted to remake the whole thing, since I have learned a lot in the process. Hubby said the same thing. Maybe we should just make Bop a wife...
Saturday, March 10, 2012
Quilt 3
When I was in high school, over 10 years ago (woh) I got fabric, and started to make a quilt.
I got distracted, and the quilt was forgotten.
Until this week.
I found the pieces and said to my self, "If I don't do it now, then it's never going to happen." Even if I just finish sewing the top, then I can give it to a thrift store...
Well, I had cut out the pieces so long ago, I did not know what to do; but one square was done, so I set to work making more squares with the other pieces.

Problem was, when all the pieces were used up, I had 11 squares.
11 squares can not be sewn together to make a blanket...
You can 2X2 (4) 2x3 (6) 2x4 (8) 3x3(9) 3x4 (12)
But 11?!?!? I'm one short, or 2 too many...What was I thinking?
So I guess I could do a 3X3 and use the extra two to make a pillow case...
OR
Find a fabric the "goes" and make a solid block to insert into the whole, maybe embroider something on it.....

I got distracted, and the quilt was forgotten.
Until this week.
I found the pieces and said to my self, "If I don't do it now, then it's never going to happen." Even if I just finish sewing the top, then I can give it to a thrift store...
Well, I had cut out the pieces so long ago, I did not know what to do; but one square was done, so I set to work making more squares with the other pieces.

Problem was, when all the pieces were used up, I had 11 squares.
11 squares can not be sewn together to make a blanket...
You can 2X2 (4) 2x3 (6) 2x4 (8) 3x3(9) 3x4 (12)
But 11?!?!? I'm one short, or 2 too many...What was I thinking?
So I guess I could do a 3X3 and use the extra two to make a pillow case...
OR
Find a fabric the "goes" and make a solid block to insert into the whole, maybe embroider something on it.....

Wednesday, January 18, 2012
Baby quilt
I finally finally finished the quilt for my baby.


I think I've been working on it for a year.
Well, not working on it constantly, but when I have the time, And there is not much of that.
Still, I'm glad that it is done, and that My little Squeeker can snuggle under it.
I used my "brother Innov-ís 950D"
The program is Anita Goodesign "Stuffed animals. 128 designs, (20 different animals, in applique, stitched, and a stuffed version) I used the applique version, as I wanted the animals to appear more like a coloring book, and for the quilt to be soft. Often the solid stitched patters end up stiff and ridges, not something that a blanket should be.
The verity of animals in relation to my woodland creature motif, left much to be desired.
No Squirrel. No Owl. No Dear. No Fox.
Alligator, Lion, monkey, giraffe, elephant, tiger? Too Jungle.
Pig, cow, horse, chicken,sheep? Too farm
So rather then have 9 different animals, I decided to reuse the design of the few that I did like. I decided I could make a Brown bear, a black bear and a white bear.
Then a white, brown, and Gray bunny.
Then the only other woodland animal was a Raccoon. I did not want two raccoon, so I fiddled with it, and turned one into a fox. (I know not I super job, but you get the idea.
That left the middle square for our little Squeaker's birthdate.
I'm very proud.
Sunday, June 26, 2011
Father's day tie
Since a tie is a traditional father say gift, I thought it appropriate to give one to hubby, this his first father's day.
So I took the stamps they made from Squeeker's feet when he was born and I made a stencil out of them. Then I used the stencil, fabric paint and a sponge to make foot prints walking up the tie.

I liked it so much I did one for my dad.
And I did one for my father in law.
(Since he as six grand kids, he got six foot prints, and two are pink because two of the grand kids are girls.)
So, Grandpa H's on the left, Hubby's in the middle and Grandpa M.on the right.
Grandpa M. had several people say nice things about the tie when he wore it to church father's day.
So I took the stamps they made from Squeeker's feet when he was born and I made a stencil out of them. Then I used the stencil, fabric paint and a sponge to make foot prints walking up the tie.

I liked it so much I did one for my dad.
And I did one for my father in law.
(Since he as six grand kids, he got six foot prints, and two are pink because two of the grand kids are girls.)
So, Grandpa H's on the left, Hubby's in the middle and Grandpa M.on the right.
Grandpa M. had several people say nice things about the tie when he wore it to church father's day.
Sunday, June 12, 2011
Rock and roll rob
I make this as a patch for the back of a motorcycle vest.
The vest was a gift for my uncle in law.
 The wings are from Anita Goodesign: glamour-rocks
The vest was a gift for my uncle in law.
 The wings are from Anita Goodesign: glamour-rocks
 I had to use the included sizing program because I only have a 4inch hoop. So the wings are 4 inches tall. It was actually very hard to do.
I had to do one wing, then re-hoop it exactly right to be able to do the second wing, and have then look even. Then re-hoop it a third time to do the monogram.
That is why it was a patch instead of putting the wings directly on the vest. I made two drafts before this trying to get the wings even and I did not want to mess it up.
I think it turned out well.
Wednesday, June 8, 2011
Strip quilt. One. Baby girl
I have to admit, I'm not a big fan of quilting. Cutting apart flat fabric just to sew them back together to make flat fabric sounds like a waste of time. But so much of the embroiderer stuff is geared towards making quilt squares, SO I asked my sister to teach me.
My sister in law is due with a baby the same time as me. I wanted to make her a quilt for her little girl.

My sister in law is due with a baby the same time as me. I wanted to make her a quilt for her little girl.

While sewing it I had cravings for Neapolitan ice cream.
I think it turned out rather well. We backed it with Brown flannel, and tied it. I ended up with a few extra squares. I offered to make her curtains or something with the other squares but she did not seamed interested in the idea. She actually did not seam all that interested in the quilt, but it's hard to tell. So perhaps I will come up with something else to do with extra quilt squares. I have about three full sized ones, and about 3 that are missing the outer layer, and two with just the first two layers....
No idea...
Thursday, June 2, 2011
Key Jacket
My sister was over, and remarked that she had only gotten one item embroidered by me.
So I said, I would do one right then, she could pick it. I showed her every design I had and then we searched the Internet for more.
We ended up with this fancy key, on the jacket she was wearing.
The Key is designed by Urban Threads.

While I am happy to see that the industry has recognized the market of under 50 years old, there really not meeting it yet. Hopefully the situation will improve over time.
Thursday, April 28, 2011
baby bib monogram

Hopefully I can make one for my baby, before he is too old.
Subscribe to:
Posts (Atom)